As well as ecommerce, I’m going to be posting more about Software-as-a-Service (SaaS). I’d previously been involved with OrderHarmony for 4 years and more recently started Receptive.
Find out more about Receptive here.

As well as ecommerce, I’m going to be posting more about Software-as-a-Service (SaaS). I’d previously been involved with OrderHarmony for 4 years and more recently started Receptive.
Find out more about Receptive here.
We ship products to many different countries and we noticed that for some areas such as Spain and the Channel Islands, we were only seeing a couple of payment options when creating an order in the Admin Panel. This was very frustrating when we wanted to use a particular payment method via the backend.
To resolve this, go to “System” > “Configuration” in your Magento Admin Panel.
The main Configuration link in the Magento Admin Panel
Look down the left-hand navigation until you see “Sales” > “Payment methods”
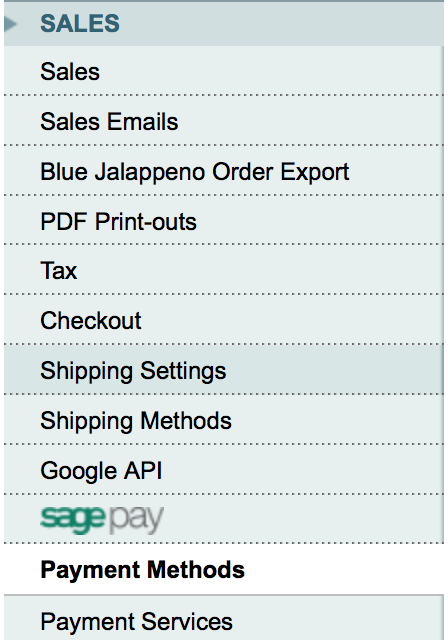
Payment methods section in the Magento Admin Panel
Once you are in this section, you will see all of the payment method options for your Store. Go through each one that you have enabled and check that the “Payment from Applicable Countries” dropdown is set to “All Allowed Countries”.

Allowed Countries dropdown on a Payment Method in the Magento Admin Panel
Doing this, tells Magento that you want that Payment Method to be used for all countries that you have said the system should use in it’s Global settings.
If you *do not* want to use all countries you have chosen in your global Magento settings, then you should pick the option “Specific Countries” where you can select an individual or group of countries to use that particular payment method.

Country selection dropdown for a Payment Method in the Magento Admin Panel
In order to reindex using the command line, you need to have SSH access to your server.
If you run your own hosting on a dedicated server, then this won’t be a problem. However, if you are on shared hosting, you are most likely not to have SSH access.
Macs have a program called “Terminal” built in. Simply hit the cmd button on your keyboard followed by the spacebar and type “Terminal”.

Terminal
A Terminal window will open and you will see your username followed by a $.
To log into your server, type the following:
ssh [user_name]@[your_server_IP_address]
Most of the time you will not want to login as “root” but I will use that as the username for this explanation.
-p 22 ssh root@123.123.123.123
Hit “Enter”
You will see the following:
[user_name]@[your_server_IP_address]’s password
For example: root@123.123.123.123’s password:
Type in the server password associated with the user.
When you are typing your password, you will not see anything. Don’t worry – your password will be being entered.
When you have successfully entered your password, you will see:
[user_name]@server[server_ip_address] [~]#
For examle: root@server123-123-123-123 [~]#
You are now logged into your server.
Magento has a folder called “Shell” which contains a script called indexer.php which you need to access to set-off the reindexing. You need to navigate to this folder on the server.
For this, you need to know the full path to it. Type “cd” (change directory) followed by the path to the “Shell” folder. It will look something like this:
cd /home/[name_of_site_folder]/public_html/shell/
Hit Enter and you will see:
[user_name]@server[server_ip_address] [/home/[name_of_site_folder]/public_html/shell/#
For example: root@server123-123-123-123 [/home/example/public_html/shell]#
If you run cpanel (or similar) you can use it to find the path to the “Shell” folder. Simply log into cpanel and you will see /home/[name_of_site_folder]/ at the top of the folder tree.
If you want to move back up a directory just type “cd”
To check the contents of the “Shell” folder, type:
ls -1
This asks the Terminal to show you the list of all the files and folders of the directory you are in. It will produce this:

Shell files
We need to work with the “indexer.php” file. Firstly, it’s a good idea to check the status of your Magento indexes. Type:
php indexer.php –status
Then press “Enter”. This produces a list of the Magento indexes and their current state.
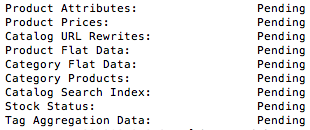
Magento indexes
Now you can choose to run a single, index, a group of indexes or all of them.
Type:
php indexer.php –info
Then press “Enter” to give you a list of the names for each index that you need to use to set of the reindex procedure.

Index names
Now type:
php indexer.php –reindex [name_of_the_index]
For example: php indexer.php –reindex catalog_url
You need to use the name from the list shown above; the name with the underscores. Hitting “Enter” will start the reindex. During this time, you will simply see the cursor in the Terminal.
Reindexing of a large index such as the catalog_url index can take several minutes so just leave Terminal open until you see the success message which will look like this:
“Catalog URL index rebuilt successfully”
To run multiple indexing, you follow the steps steps as you would for running a single index and simply add more index names separating them with a comma. Here are the full steps:
Type:
php indexer.php –info
Then press “Enter” to give you a list of the names for each index that you need to use to set of the reindex procedure.
Index names
Now type:
php indexer.php –reindex [name_of_the_index],[name_of_the_index],
For example: php indexer.php –reindex catalog_url,cataloginventory_stock
You need to use the names from the list shown above; the names with the underscores. Hitting “Enter” will start the reindex. During this time, you will simply see the cursor in the Terminal.
Reindexing of a large index such as the catalog_url index can take several minutes so just leave Terminal open until you see the success message which will look like this:
“Catalog URL index rebuilt successfully”
An individual sucess message will be shown for each index that you asked to be reindexed.
If you want to reindex all of Magento’s indexing then use the following command:
php indexer.php –reindexall
You will need to wait for a success message for every index until the process is complete.
Once you have run the indexes successfully, you need to carefully log out of your server. To do this type exit into Terminal.
You will then see a message:
Connection to [your_server_ip_address] closed.
One of the great features about Magento is that you can run multiple websites from a single Magento instance.
I’d been testing this feature then wanted to remove the second store I created (all done on my test install – not on a live site). I read the instructions and it looked to be a simple case of logging into the Admin Panel and going to:
System > Manage Stores

Manage Magento Stores
From here, you can select a website and choose to “Delete” it. That’s what I did…and found myself with an Admin Panel error showing a list of paths to missing files.
The reason this error occurs is that removing the Website through the Admin Panel leaves the Website in the database along with any products associated with that Website.
To fully remove the second Website you need to remove it from 3 different database tables and also reassign the products set to the second Website back to the default.
I found these tasks easiest to complete through phpmyadmin.
First, you need to remove the record for the second Website from the following database tables:
core_store
core_store_group
core_website
Finally, you need to reassign any products only associated with your second Website back to your default Website.
Go to the catalog_product_website table. This is where every product on your Magento instance is associated with a Website ID. Because I only had a second Website with a few products assigned to it, I sorted the “website_id” column and simply deleted the 5 products associated with the second Website.
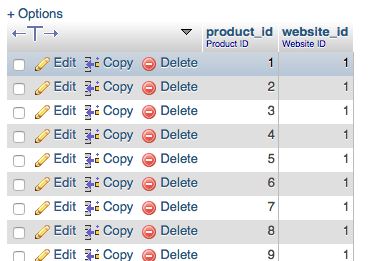
catalog_product_website table
If you have many products associated with a second Website or multiple Websites running, you would need to run an SQL query.
Remember to clear caches and give the site time to refresh. I made these database changes but had to clear browser cache and reindex my site from the command line for the Admin Panel to come back up again.
I recently received the “Web Literacy Skill Sharer” badge from the Mozilla Webmaker project.
Here is it!

Web Literacy Skill Sharer badge
The Mozilla Webmaker project is a great community project which is “dedicated to teaching digital skills and web literacy.”
I’m now a mentor on the website and more news on this will follow.
Another great website for starting to learn coding skills is Code Academy which I’ve been using since 2012.
To create a sandbox account, you need to have an existing business paypal account. Go to paypal.com and login as usual.

Paypal login boxes
You will see your Paypal Dashboard.

Paypal dashboard
Open a new browser tab and go to:
https://developer.paypal.com/developer
This gives you access to the Paypal Developer section where you can create and manage your sandbox accounts.
Click on “Dashboard” at the top of the screen.

Paypal Developer Dashboard
Go to “Accounts” under “Sandbox” in the left-hand navigation. This is where you can view your existing test account or create a new one.

PayPal sandbox accounts
Click the little arrow next to your sandbox account email address and you will see the “Profile” link.

Paypal sandbox accounts
Clicking on “Profile” opens a pop-up which gives you access to the API information you need to enter into Magento.

Paypal API sandbox details
Next you need to add your sandbox details to your Magento account.
If you already have an email address and password for your Paypal sandbox account, you can simple start at the steps below.
Login to your Magento Admin Panel and got to “System” > “Configuration”
Click on “Payment Methods” in the left-hand navigation.

Magento’s payment method configuration
Choose the PayPal method you would like to use on your Magento site and click on it.

Paypal methods in Magneto
Click the orange “Configure” button.

Configure Paypal
Enter your Paypal sandbox email address and API details from the Paypal Developer site or alternatively, you can click on the orange “Sandbox credentials” button.

Paypal settings
Clicking the “Sandbox Credentials” button shows a pop-up where you enter your sandbox email address and password. Entering these details successfully returns the following which you enter into Magento:
Ensure that the “Sandbox Mode” is set to “Yes” and then save your changes.
Finally, you should always test your work. Go to the front-end of you Magento website and place an order using Paypal as the chosen payment method.
You will find your test card details associated with your Paypal sandbox in the same place that the API credentials are shown in the Paypal Developer Dashboard (click in “Profile” of the chosen test account and visit the “Funding” tab).

Paypal sandbox test card details
Use the card details shown to create test payments on your sandbox account.
To check that the test transaction has been recorded, click on the “Notifications” link of your sandbox account in the Paypal Developer Dashboard.
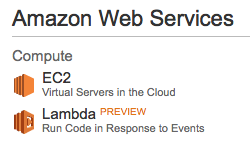
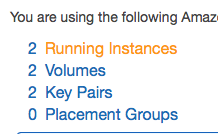
Log in to your AWS console and click on “EC2”
Click on your instances.
Take the “Public DNS” data from the “Public DNS” column.

It will be formatted something like this:
ec2-XX-XX-XXX-XX.eu-west-1.compute.amazonaws.com
Open Cyberduck and click on “Open Connection”

Then enter the “Public DNS” of your EC2 instance into the “Server” field in Cyberduck and the “Username”
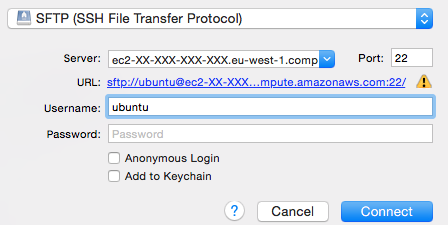
If you have a Linux instance running, you will need to use “ec2-user” as the “Username” in Cyberduck.
If you are using Ubuntu, then you need to use “ubuntu” as the “Username”
Next you need to check the “Use Public Key Authentication” checkbox. When you do this you will see the option to choose the file from your computer. You are given this .pem file when you create your EC2 instance.

Select the .pem file from the location you saved it then click “Connect”.

You will then see you have access to the files on you EC2 instance in AWS.
I often use this interface to update plugin files (some don’t work or simply cannot be installed using the Magento Connect interface you access via Magento’s Admin Panel) and I’ve most recently used the back-up function.
We’re in the process of creating a failover site on the Amazon Web Services platform (further posts to come on that topic) and I needed to take a full backup of the site to deploy on the AWS EC2 instance.
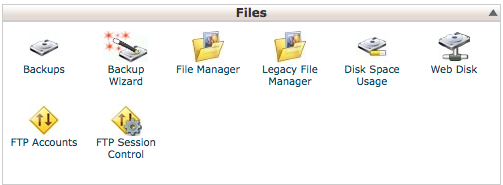
To do this, log in to the cpanel of your main website, then go to “Backup Wizard” in the “Files” section.
Using the Backup Wizard gives you the option to download a full backup (files, databases and configuration) or you can be more selective.
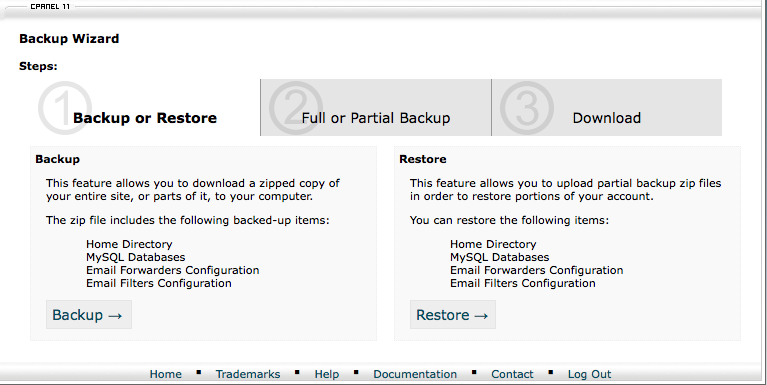
Click on “Backup” then choose a full or partial backup of the system. In this case, I chose to take a backup of the “Home directory” which is all of yoru Magento files. As soon as you select the directory, it simply downloads to you machine.

When you take a full backup, the file is created as a .zip and you can then access it from the home directory.
I took a full site backup to begin with but when trying to upload the file to our AWS server using SFTP, it was failing everytime. As a result, the best way to create the backup and transfer it has been to take each section (files, database, configuration) and transfer them to the AWS server separately. More on how to transfer files to an EC2 instance on AWS using Cyberduck is here.
When you install, uninstall or upgrade a plugin using Magento Connect Manager, it automatically puts your website into “maintenance mode” – you can’t access the Admin Panel or the store front during this time.
However, when something goes wrong with a plugin upgrade, install/uninstall, your website will remain in maintenance mode and you have to do some manual server work to restore it.
I recently found a bug in the Magento Connect Manager and in order to get the site out of maintenance mode I had to do the following:
When you have done this, your Magento store front will be available again.
After the bad experience I had with upgrading our eBay plugin using Magento Connect Manager, removing “maintenance.flag” restored the Store front but we were unable to access the Admin Panel.
To access Admin Panel again, I did the following:
Following this, we were able to successfully access the Admin Panel. Phew.
Oh dear! At the end of last week I managed to accidently removed our M2E Pro eBay integration by simply updating it using Magento Connect Manager. Magento Connect Manger is the inbuilt tool that you use from the Admin Panel in order to install, uninstall and update the plugin you have running on your Magento site.
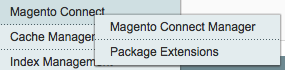
To access it, log into your Magento Admin Panel and go to: System > Magento Connect > Magento Connect Manager
You will then be asked to enter your Admin Panel username and password again before being taken to the Magento Connect screen where you will see a list of yoru installed plugins. I clicked on the “Check for Upgrades” button and this showed that a number of plugins had new stable versions released.

In theory, you simply choose which version of the plugin you want to upgrade to and hit “Commit Changes”. I thought this would be safe to do on the live site because it was a stable version and the update was being run through the Magento Connect Manager.
What actually happened was that the upgrade failed and removed the plugin access from the Admin Panel!
When Magento installs a plugin, it kicks the site into “Maintenance mode” so I was left with the front-end showing a “Maintenance mode” message and no access to the Admin Panel. See my post about how to recover your Magento site after a failed plugin upgrade.
I contacted M2E support about this issue and they were fantastic; responding in just a few hours. This is when I learned about the compatibility issue between the Magento Connect Manager and php greater than 5.3.x
This issue will also occur when you install a plugin. When I was implenting Mage Backups part of the plugin was showing an error and this was for the same reason – the plugin contained a file which had a path exceeding 100 characters.
There are two options here:
Note that in the case of our M2E plugin, I had to manually removed the following files and directories from the server before doing a manual install:
You should remove these files/directories:
‘app/code/community/Ess/M2ePro’, ‘app/design/adminhtml/default/default/layout/M2ePro.xml’, ‘app/design/adminhtml/default/default/template/M2ePro’, ‘app/etc/modules/Ess_M2ePro.xml’, ‘js/M2ePro’, ‘skin/adminhtml/default/default/M2ePro’, ‘skin/adminhtml/default/enterprise/M2ePro’
Separate blog post to come on how to manually install a Magento plugin using cpanel. In summary, it’s more time consuming to add plugins to the server manually but much safer.
